Introduction
In this chapter, we'll explore two fundamental HTML elements that help organize and display data: Lists and Tables.
Lists are used to group related items together, making content more readable and structured.
Tables allow us to display data in a grid format with rows and columns, perfect for comparing information or presenting structured data.
We'll cover different types of lists, how to create nested lists, and then move on to building tables with various features and styling options.
List Recap
Before diving into advanced list techniques, let's quickly recap the basic list types:
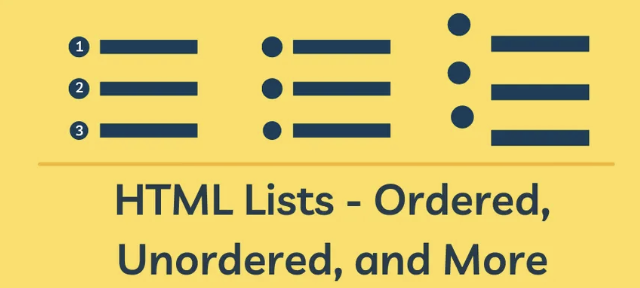
Unordered Lists (<ul>):
- Use bullet points
- Items have no specific order
- Created with <ul> and <li> tags
Ordered Lists (<ol>):
- Use numbers or letters
- Items have a specific sequence
- Created with <ol> and <li> tags
Description Lists (<dl>):
- Term
- Description of the term
- Another Term
- Description of another term
Nested List (Example 1)
Nested lists allow you to create hierarchical structures within your lists.
Basic Nested List:
Click to view code example
<ul>
  <li>Fruits
    <ul>
      <li>Apple</li>
      <li>Banana</li>
    </ul>
  </li>
  <li>Vegetables
    <ul>
      <li>Carrot</li>
      <li>Broccoli</li>
    </ul>
  </li>
</ul>
Nested List (Example 2)
This example shows a more complex nested structure with multiple levels.
Multi-Level Nested List:
Click to view code example
<ol>
  <li>Chapter 1
    <ol>
      <li>Section 1.1</li>
      <li>Section 1.2
        <ul>
          <li>Subsection 1.2.1</li>
          <li>Subsection 1.2.2</li>
        </ul>
      </li>
    </ol>
  </li>
  <li>Chapter 2</li>
</ol>
Nested List (Example 3)
This example demonstrates mixing ordered and unordered lists in a nested structure.
Mixed List Types:
Click to view code example
<ul>
  <li>Programming Languages
    <ol>
      <li>Python</li>
      <li>JavaScript</li>
      <li>Java</li>
    </ol>
  </li>
  <li>Web Technologies
    <ul>
      <li>HTML</li>
      <li>CSS</li>
      <li>React</li>
    </ul>
  </li>
</ul>
Nested List (Example 4)
This example shows a description list with nested elements.
Description List with Nesting:
Click to view code example
<dl>
  <dt>Frontend Development</dt>
  <dd>Creating user interfaces
    <ul>
      <li>HTML</li>
      <li>CSS</li>
      <li>JavaScript</li>
    </ul>
  </dd>
  <dt>Backend Development</dt>
  <dd>Server-side logic
    <ol>
      <li>Node.js</li>
      <li>Databases</li>
      <li>APIs</li>
    </ol>
  </dd>
</dl>
List with Heading
You can combine headings with lists to create well-structured content sections.
Example with Headings:
Click to view code example
<h3>My Favorite Foods</h3>
<ul>
  <li>Pizza</li>
  <li>Burger</li>
  <li>Pasta</li>
</ul>

<h3>My Hobbies</h3>
<ol>
  <li>Reading</li>
  <li>Gaming</li>
  <li>Coding</li>
</ol>
Homework
Practice what you've learned about lists and tables:
- Create a nested list of your favorite foods categorized by meal type
- Make a table of your weekly schedule with proper headers
- Create a description list explaining different programming languages
- Build a table showing product information with colspan and rowspan
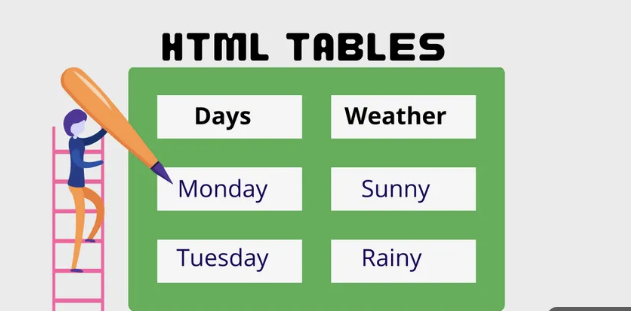
Introduction to HTML Tables
HTML tables are used to display data in a structured, grid-like format. Tables consist of rows and columns that intersect to form cells.
Why use tables?
- Display tabular data clearly
- Compare information side by side
- Create structured layouts
- Present data in an organized manner
Tables are created using the <table> tag, with rows defined by <tr> tags and cells defined by <td> (data) or <th> (header) tags.
Rows and Columns
Tables are organized into rows and columns:
- Rows (<tr>): Horizontal lines of data
- Columns: Vertical lines of data (created by aligning cells in the same position across rows)
- Cells: Individual data points at the intersection of rows and columns
Each row is defined by a <tr> tag, and within each row, cells are defined by <td> or <th> tags.
Table Example 1
A basic table with headers and data:
Click to view code example
<table>
  <tr>
    <th>Name</th>
    <th>Age</th>
    <th>City</th>
  </tr>
  <tr>
    <td>John</td>
    <td>25</td>
    <td>New York</td>
  </tr>
  <tr>
    <td>Jane</td>
    <td>30</td>
    <td>London</td>
  </tr>
</table>
Material Icon Theme Extension
Material Icons are a popular icon library from Google that can be easily integrated into HTML tables and other elements.
Adding Material Icons:
<!-- Add this to your <head> -->
<link href="https://fonts.googleapis.com/icon?family=Material+Icons" rel="stylesheet">

<!-- Use icons in your HTML -->
<i class="material-icons">home</i>
<i class="material-icons">search</i>
Common Material Icons for tables: home, search, edit, delete, add, etc.
table Tag
The <table> tag defines an HTML table. It serves as the container for all table content.
Basic Structure:
<table>
  <!-- Table rows and cells go here -->
</table>
Common Attributes:
- border: Adds borders to the table
- width: Sets table width
- cellspacing: Space between cells
- cellpadding: Space within cells
td Table Data Cell
The <td> tag defines a standard data cell in an HTML table. It contains the actual data content.
Usage:
<table>
  <tr>
    <td>Data 1</td>
    <td>Data 2</td>
  </tr>
</table>
Common Attributes:
- colspan: Number of columns the cell should span
- rowspan: Number of rows the cell should span
- width: Cell width
- height: Cell height
Adding Borders to a Table
You can add borders to tables using CSS or the border attribute.
Using border attribute:
<table border="1">
  <tr>
    <td>Cell 1</td>
    <td>Cell 2</td>
  </tr>
</table>
Using CSS:
<style>
table, th, td {
  border: 1px solid black;
  border-collapse: collapse;
}
</style>
tr Table Row
The <tr> tag defines a row in an HTML table. All cells within a row are contained within <tr> tags.
Structure:
<table>
  <tr>
    <!-- Cells go here -->
  </tr>
  <tr>
    <!-- More cells -->
  </tr>
</table>
Each <tr> represents one horizontal row in the table.
Table Example 2
A more complex table with styling:
<table border="1">
  <tr>
    <th>Product</th>
    <th>Price</th>
    <th>Quantity</th>
  </tr>
  <tr>
    <td>Laptop</td>
    <td>$999</td>
    <td>5</td>
  </tr>
  <tr>
    <td>Mouse</td>
    <td>$25</td>
    <td>20</td>
  </tr>
</table>
th Table Header Cell
The <th> tag defines a header cell in an HTML table. Header cells are typically displayed in bold and centered.
Usage:
<table>
  <tr>
    <th>Header 1</th>
    <th>Header 2</th>
  </tr>
  <tr>
    <td>Data 1</td>
    <td>Data 2</td>
  </tr>
</table>
Table Header, Body, and Footer (thead, tbody, tfoot)
HTML tables can be divided into three main sections:
- <thead>: Table header (column headers)
- <tbody>: Table body (main data)
- <tfoot>: Table footer (summary, totals, etc.)
Structure:
<table>
  <thead>
    <tr><th>Header</th></tr>
  </thead>
  <tbody>
    <tr><td>Data</td></tr>
  </tbody>
  <tfoot>
    <tr><td>Footer</td></tr>
  </tfoot>
</table>
Quick Review of Tables
Let's review the key table elements:
| Tag | Purpose | Description |
|---|---|---|
| <table> | Container | Defines the table structure |
| <tr> | Row | Defines a table row |
| <th> | Header Cell | Defines a header cell (bold, centered) |
| <td> | Data Cell | Defines a standard data cell |
Table Example 3
A complete table with thead, tbody, and tfoot:
<table border="1">
  <thead>
    <tr>
      <th>Item</th>
      <th>Quantity</th>
      <th>Price</th>
    </tr>
  </thead>
  <tbody>
    <tr>
      <td>Apple</td>
      <td>5</td>
      <td>$2.00</td>
    </tr>
    <tr>
      <td>Orange</td>
      <td>3</td>
      <td>$1.50</td>
    </tr>
  </tbody>
  <tfoot>
    <tr>
      <td>Total</td>
      <td>8</td>
      <td>$3.50</td>
    </tr>
  </tfoot>
</table>
Understanding Colspan
The colspan attribute allows a cell to span across multiple columns.
Example:
<table border="1">
  <tr>
    <th colspan="2">Personal Information</th>
  </tr>
  <tr>
    <td>Name</td>
    <td>John Doe</td>
  </tr>
  <tr>
    <td>Age</td>
    <td>25</td>
  </tr>
</table>
The header cell spans across 2 columns using colspan="2".
Table Example 4
Using colspan to create a more complex table layout:
<table border="1">
  <tr>
    <th colspan="3">Student Grades</th>
  </tr>
  <tr>
    <th>Subject</th>
    <th>Midterm</th>
    <th>Final</th>
  </tr>
  <tr>
    <td>Math</td>
    <td>85</td>
    <td>90</td>
  </tr>
  <tr>
    <td>Science</td>
    <td>88</td>
    <td>92</td>
  </tr>
</table>
Understanding Rowspan
The rowspan attribute allows a cell to span across multiple rows.
Example:
<table border="1">
  <tr>
    <th>Name</th>
    <td>John Doe</td>
  </tr>
  <tr>
    <th rowspan="2">Subjects</th>
    <td>Math</td>
  </tr>
  <tr>
    <td>Science</td>
  </tr>
</table>
The "Subjects" header cell spans across 2 rows using rowspan="2".
Table Example 5 (Advanced)
A complex table using both colspan and rowspan:
<table border="1">
  <tr>
    <th rowspan="3">Student</th>
    <th colspan="2">Grades</th>
    <th rowspan="3">Average</th>
  </tr>
  <tr>
    <th>Math</th>
    <th>Science</th>
  </tr>
  <tr>
    <td>85</td>
    <td>90</td>
  </tr>
  <tr>
    <td>John Doe</td>
    <td>85</td>
    <td>90</td>
    <td>87.5</td>
  </tr>
</table>
Unordered HTML List
An unordered list starts with the <ul> tag. Each list item starts with the <li> tag.
The list items will be marked with bullets (small black circles) by default.
Example
<ul>
  <li>Coffee</li>
  <li>Tea</li>
  <li>Milk</li>
</ul>
- Coffee
- Tea
- Milk
Ordered HTML List
An ordered list starts with the <ol> tag. Each list item starts with the <li> tag.
The list items will be marked with numbers by default.
Example
<ol>
  <li>Coffee</li>
  <li>Tea</li>
  <li>Milk</li>
</ol>
- Coffee
- Tea
- Milk
HTML Description Lists
HTML also supports description lists.
A description list is a list of terms, with a description of each term.
The <dl> tag defines the description list, the <dt> tag defines the term (name), and the <dd> tag describes each term.
Example
<dl>
  <dt>Coffee</dt>
  <dd>- black hot drink</dd>
  <dt>Milk</dt>
  <dd>- white cold drink</dd>
</dl>
- Coffee
- - black hot drink
- Milk
- - white cold drink
Nested Lists
You can nest lists inside each other to create sub-lists.
Example
-
Fruits
- Apple
- Banana
-
Vegetables
- Carrot
- Broccoli
HTML Tables
HTML tables allow web developers to arrange data into rows and columns.
Define an HTML Table
A table in HTML consists of table cells inside rows and columns.
Example
<table>
  <tr>
    <th>Company</th>
    <th>Contact</th>
    <th>Country</th>
  </tr>
  <tr>
    <td>Alfreds Futterkiste</td>
    <td>Maria Anders</td>
    <td>Germany</td>
  </tr>
  <tr>
    <td>Centro comercial Moctezuma</td>
    <td>Francisco Chang</td>
    <td>Mexico</td>
  </tr>
</table>
| Company | Contact | Country |
|---|---|---|
| Alfreds Futterkiste | Maria Anders | Germany |
| Centro comercial Moctezuma | Francisco Chang | Mexico |
Table Cells
Each table cell is defined by a <td> and a </td> tag.
<td> stands for table data.
Everything between <td> and </td> is the content of a table cell.
Table Rows
Each table row starts with a <tr> and ends with a </tr> tag.
<tr> stands for table row.
Table Headers
Sometimes you want your cells to be table header cells. In those cases use the <th> tag instead of the <td> tag.
<th> stands for table header.
Example
| Person 1 | Person 2 | Person 3 |
|---|---|---|
| Emil | Tobias | Linus |
| 16 | 14 | 10 |
Advanced Table Example
Tables can use colspan and rowspan for merging cells.
| Student Info | |
|---|---|
| John | Math |
| Science | |
“Learning never exhausts the mind.” – Leonardo da Vinci
Homework
- Create a nested list of your favorite foods.
- Make a table of your weekly schedule.
Practice Exercises
Exercise 1: Create a Product Catalog Table
Create an HTML table showing a product catalog with columns for Product Name, Price, and Description.
Click to reveal the solution
<table>
  <thead>
    <tr>
      <th>Product Name</th>
      <th>Price</th>
      <th>Description</th>
    </tr>
  </thead>
  <tbody>
    <tr>
      <td>Laptop</td>
      <td>$999</td>
      <td>High-performance laptop for work and gaming</td>
    </tr>
    <tr>
      <td>Mouse</td>
      <td>$25</td>
      <td>Wireless optical mouse</td>
    </tr>
    <tr>
      <td>Keyboard</td>
      <td>$75</td>
      <td>Mechanical gaming keyboard</td>
    </tr>
  </tbody>
</table>
Exercise 2: Nested Shopping List
Create a nested list for a shopping trip, organized by store sections.
Click to reveal the solution
<h2>Shopping List</h2>
<ul>
  <li>Produce Section
    <ul>
      <li>Apples</li>
      <li>Bananas</li>
      <li>Carrots</li>
    </ul>
  </li>
  <li>Dairy Section
    <ul>
      <li>Milk</li>
      <li>Cheese</li>
      <li>Yogurt</li>
    </ul>
  </li>
  <li>Baking Section
    <ul>
      <li>Flour</li>
      <li>Sugar</li>
      <li>Baking powder</li>
    </ul>
  </li>
</ul>
Exercise 3: Student Grade Table
Create a table showing student grades with proper table headers and data cells.
Click to reveal the solution
<table>
  <caption>Student Grades - Fall Semester</caption>
  <thead>
    <tr>
      <th>Student Name</th>
      <th>Math</th>
      <th>Science</th>
      <th>English</th>
      <th>Average</th>
    </tr>
  </thead>
  <tbody>
    <tr>
      <td>Alice Johnson</td>
      <td>95</td>
      <td>88</td>
      <td>92</td>
      <td>92</td>
    </tr>
    <tr>
      <td>Bob Smith</td>
      <td>87</td>
      <td>91</td>
      <td>85</td>
      <td>88</td>
    </tr>
    <tr>
      <td>Carol Davis</td>
      <td>93</td>
      <td>89</td>
      <td>94</td>
      <td>92</td>
    </tr>
  </tbody>
</table>
Exercise 4: Recipe with Ingredients List
Create a recipe page with an ordered list for instructions and an unordered list for ingredients.
Click to reveal the solution
<h1>Simple Pasta Recipe</h1>

<h2>Ingredients</h2>
<ul>
  <li>200g pasta</li>
  <li>2 tablespoons olive oil</li>
  <li>2 cloves garlic, minced</li>
  <li>Salt and pepper to taste</li>
  <li>Parmesan cheese (optional)</li>
</ul>

<h2>Instructions</h2>
<ol>
  <li>Bring a large pot of salted water to boil.</li>
  <li>Add pasta and cook according to package directions.</li>
  <li>While pasta cooks, heat olive oil in a pan.</li>
  <li>Add minced garlic and sauté for 1-2 minutes.</li>
  <li>Drain pasta and toss with garlic oil.</li>
  <li>Season with salt and pepper.</li>
  <li>Serve with grated Parmesan if desired.</li>
</ol>
Chapter 3 Summary
Key Takeaways
- Unordered Lists (<ul>) create bullet-point lists using <li> elements
- Ordered Lists (<ol>) create numbered lists with automatic numbering
- Description Lists (<dl>) pair terms (<dt>) with descriptions (<dd>)
- Nested Lists allow you to create hierarchical list structures
- Tables (<table>) organize data in rows (<tr>) and cells (<td>, <th>)
- Table Headers (<th>) provide context and improve accessibility
What You Learned
In this chapter, you became proficient with HTML lists and tables:
- Creating different types of lists (unordered, ordered, description)
- Nesting lists for complex hierarchical structures
- Building basic tables with rows and cells
- Using table headers for better accessibility
- Adding captions and summaries to tables
- Creating complex table structures with colspan and rowspan
Next Steps
Now that you can structure content with lists and tables, you're ready to learn about HTML document structure and file organization. In Chapter 4, you'll discover:
- HTML file paths and how browsers locate files
- The complete HTML document boilerplate
- Proper HTML document structure
- Meta tags and their importance
Practice What You've Learned
- Create a recipe page using ordered and unordered lists
- Build a table displaying product information
- Make a comparison table with multiple columns
- Create nested lists for a table of contents
- Design a schedule or calendar using tables
Ready for the next chapter? Continue to Chapter 4 →